This tutorial intends to teach you how to use the SetObjectTexture command with your model. What is SetObjectTexture ? It's a command you can use in a script or in the EventHandler (init field etc...) that changes the textures of a selected part of your model. Ok, it looks a bit scary, but it's very easy to use...
As an exemple, look at the numbers on the side of this Panther:

I
can these numbers in the game by running a script. This script can be
automatically exectuted by the tank, or it can be added in the init field
in the editor etc... Why using this method ? Because i dont want to have
a thousand Panthers in the editor just because of the different numbers
(Panther 001, Panther 002 etc...). Instead i can have a Panther with one
camo theme in the editor, then a number is generated randomly or i can
set one in the game ! Also the same thing is done on that panther for
the kill count rings on the barrel...
One important thing : The textures which has been set by SetObjectTexture
are not displayed a higher resolution than 32 per 32 in the game... I
dont know why, as i higher the graphic settings at maximum on my computer
(and i have a good one ;-) ). I assume it's a bug from BIS, so SetObjectTexture
is good for small surface only !
Another important thing : this is for Resistance only !!!
So this is how it works :
1. Create the selection
The
first thing to do is to make an hidden selections out of each number.
If you dont know about hidden selections, you must read the tutorial I
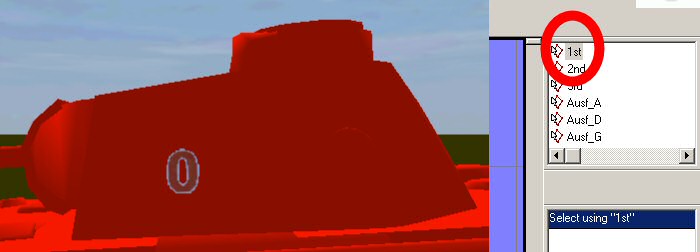
made about it. So in this exemple, this is what we got on the turret :
I made a named selection for the 1st numbers on each side of the turret
(I have also the 3 numbers on the other side). I named this selection
"1st" (but you can name it as you like). you will notice that
this selection is already textured. Otherwise it will not work properly.
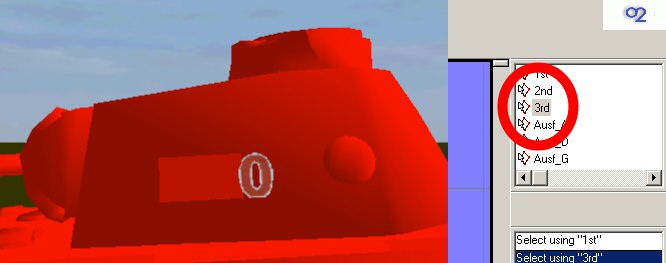
Same thing for the second and third numbers :

2.
Coding the selections in the config.cpp
Declare
these selections in the same way as any hidden selections and hide it
for EVERY vehicles.
When you will put the "hiddenSelections[]=" property for each
vehicle class, always keep the same order and put your selections at the
begining of the list. Exemple :
class
CfgVehicles class
ECA_PantherG1:ECA_PantherG1 |
3. Changing the texture in a script.
You are now able to change the texture on each selection in a script. Here is an exemple :
//
Script to set the number 135 on the side of a Panther _TankUnit
setObjectTexture [0,"\ECA_Panther\nums\1.pac"] |
As
you can see the setObjectTexture command recquire 3 parameters. First,
the unit which will execute that command (in this case, the vehicle which
call this script).
then, between the brackets, you two more parameters. The first one is
which selection is going to be retextured :
The first selection of the "hiddenSelections[]=" property list
in the config.cpp is number 0. The second is number 1, the third is number
2 etc...
That's why it is very important to keep the same order in the list when
you declare a new vehicle, and to put the selection you want to retexture
at the begining of this list. Otherwise, you will have a different position
for the selection named "1st" in the "hiddenSelections[]="
list of every Panther !
There is nothing else to do... you now have the hability to retexture
what you want in the game (but at a crappy resolution...?).
You can use this command where you like, as for exemple in the eventHandlers
of the vehicle (in the config.cpp), or as a user action... for exemple
a user action named "add a ring" when the player comes close
to the barrel of the Panther.